This project started with me hanging out in the workshop, day dreaming and staring at my remaining wood supply. 'I wonder what I can use this 2m length of 2"x2" (42mm x 42mm) for?'.
My first coffee table was a success (to me anyway) and it gets used everyday - this post has been written on it! However, I didn't actually make the top from scratch, it was reused from an Ikea type piece of (crap) furniture I reclaimed from the dump. Also, it's quite small and is generally permanently taken up by my laptop. Time for a larger one...
As already mentioned, I had a 2m length of 42mm x 42mm which I figured would make four legs and two 1.5m lengths of 67mm x 32mm which would make some nice chunky stretchers.
Let the woodworking begin...

Cross cutting the legs and stretchers to length with the carcass saw on the bench hook.

Precision trimming to length on the shooting board. Legs are the coffee table standard height (or so it seems) of 40cm.

Doh! - I managed to make a mistake within minutes of starting by cutting one of the short stretchers too long - more coffee required! This means the long stretchers will be a bit shorter as a result as I planned one long and one short stretcher from each length of wood. Oh well, I'm not building to any specific sizes.

The table base pieces - four legs, two long (90cm) & two short (47cm) stretchers.

After learning from my mistakes in the past, I now mark all my pieces using masking tape that's easy to remove. I have tried to orientate each piece to show the best grain. Pencil marks always seem a hassle to clean up at the end and I always miss some.

Marking out the tenons. I have decided to have the stretchers flush with the outside face of the legs and offset the tenons to make them stronger by having more wood between the mortises at each corner.

Cutting the tenons with my dovetail saw.

Eight tenons cut, time for the mortises...

I mark out the mortise using a knife and then pare inside the waste side of the line with a chisel to create a shoulder before chopping out the waste. Here you can see how the joint will be offset.

Here is my favoured set up for chopping mortises & dovetails. I use a large butchers block on my saw bench. The small scrap of wood with a screw in it I use to check the depth of the mortise.
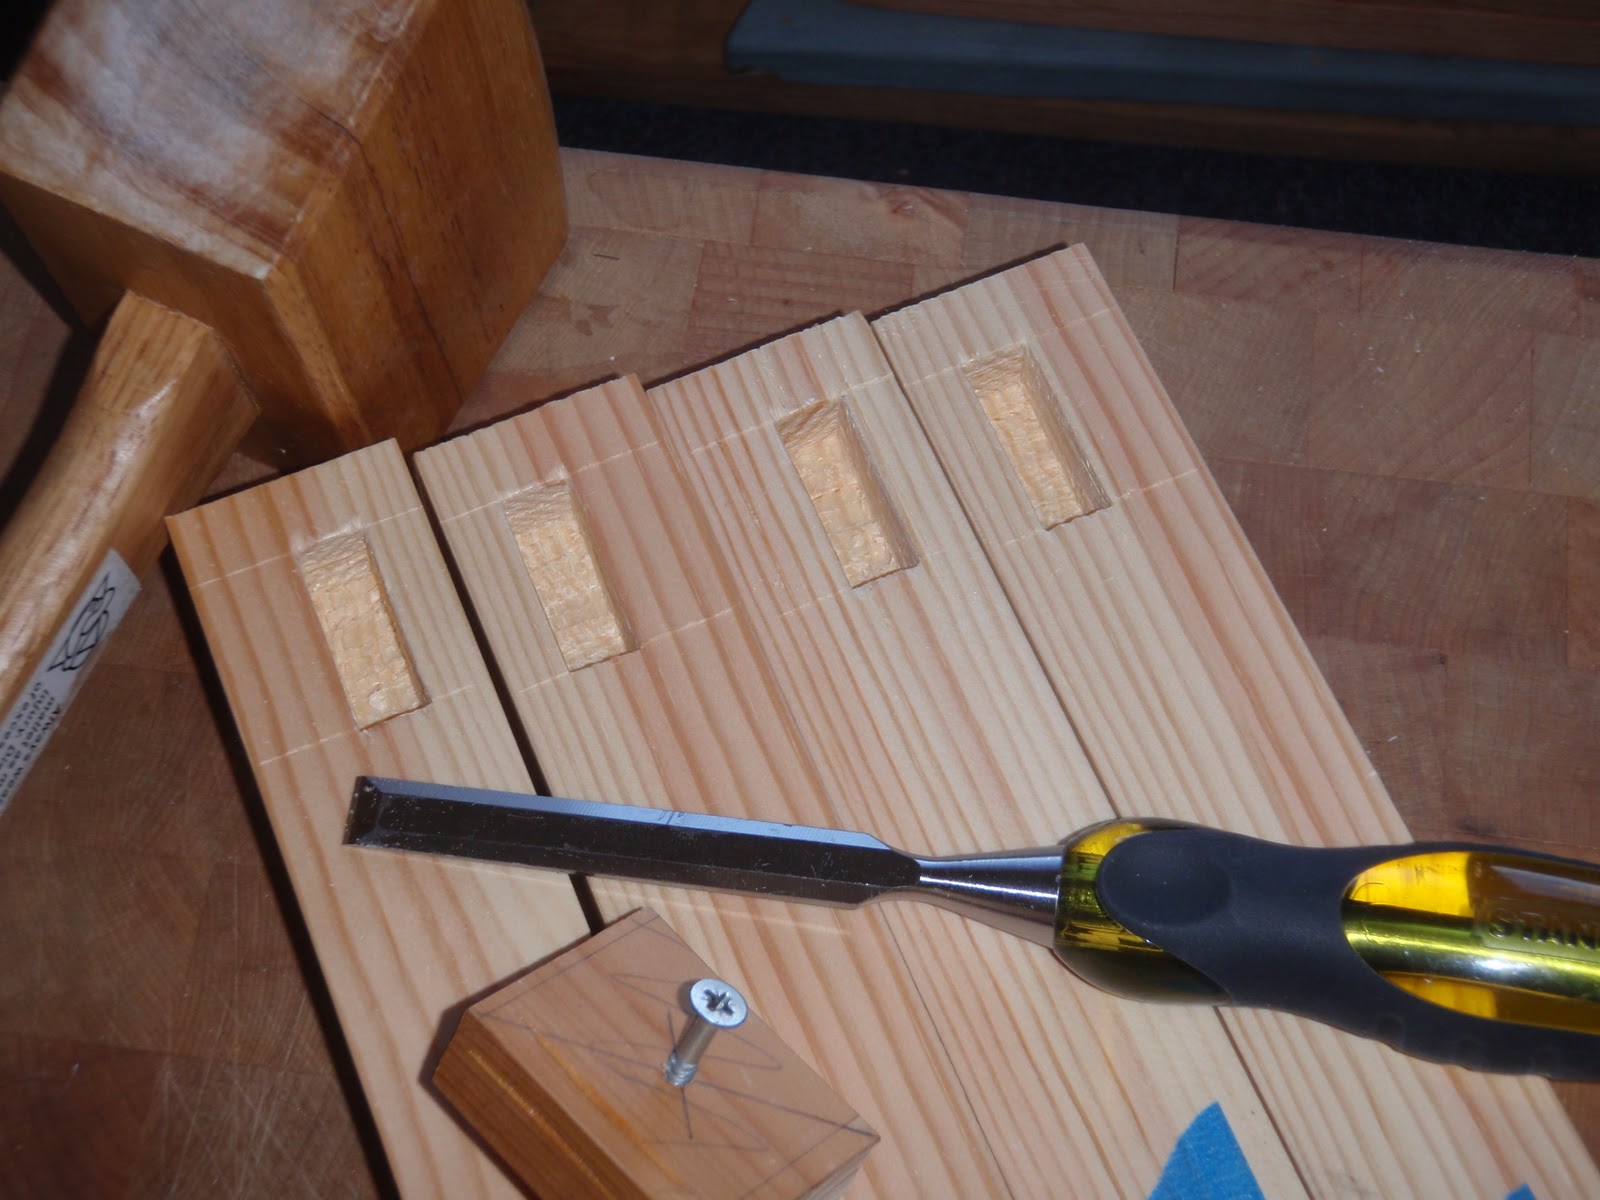
Eight mortises ready to go... two per leg.

Doh! - Working with soft Pine, you would think I would have learnt to be more careful by now. Forgetting to brush away the debris during chopping means the piece I am working on gets marked easily from the chips that find their way underneath. More clean up to do at the end.

Using the shoulder plane and bench chisels to fine tune the joinery and do a 'dry fit'.

Before gluing up the base I planed all the 'show side' joinery flush. Now I need a top...

Fresh from the timber merchants, three pieces of kiln dried 38mm x 225mm Pine all cut from the same single plank. I think it's Southern Yellow Pine and I allowed it to sit in my room for a few days before using it.

I allowed about 10cm over on each piece to give me room to work around the knots. Back to the bench hook with my large tenon saw to cut to length.

My sawing skills are getting better and better - you just can't beat a good saw!

Despite a little twist in the boards, I decided to go ahead and glue them up. I will flatten them altogether afterwards. First two boards (shown) were glued, then the third afterwards.

Let the sweating commence ... I planed the top face flat using my no#4 set to take a deep cut to remove the small ridges that resulted from the boards not being slightly twisted. Then followed up using my no#6 to get everything flat. I am not worried about the bottom side as this will not be seen when the table is complete, I only need to make sure the edges are flat so it sits nicely on the table base.

Cleaning up the glue marks on the end grain.

Chamfering the edges, nothing too fancy... I also chamfered the table base and rounded all the corners.

Time for a 'tune up', getting everything nice and sharp before smoothing the table top. A tighter mouth, a closer chip breaker and a honed blade set for the shallowest cut possible made for a lot less tear out. I still suffered some planing tracks though, its almost impossible to camber the blade using the Veritas MkII honing guide.

Liquid wax is new for me as I have been using Good Ol' Boiled Linseed Oil for all my projects so far. First application and ...I hate it!

Second application and then a light coat of well rubbed Boiled Linseed oil - I love it!

I have decided against fitting the table top directly to the stretchers as originally planned. Instead I am going to make some small blocks attached to the stretchers to screw into the table top.Hopefully screws will take care of any seasonal shrinkage or expansion of the top.

Glueing the blocks to the base. I am sure they will be strong enough using modern glue as each glued surface is (side grain to side grain) 32mm x 52mm and there are six of them. Also, the only time these are loaded is when the table is being lifted up. The actual table base weighs very little. Time will tell...
Two coats of liquid wax, followed by a rubbing of BLO into the table base and it was on with the top. With the table top face down on the floor and the base on top of it, I measured the distances all around to make sure the top was square. Once again I used my gimlets (i love these things) to drill the pilot holes before screwing in each of the six 1 1/2" screws.
There are a few slight finishing marks that could be sorted by light sanding and re-waxing as a result of squeeze out glue i missed, or rather glue i rubbed away but not completely, hence it went unnoticed until waxing. Other than that - job done!

It's quite difficult to get accurate pictures using flash, but the top actually looks quite stunning in real life. With the table top measuring 104cm x 64cm, this is my largest project yet and I was struggling for room in my small 'workshop', I assembled the base to the top in a bedroom! I really like the liquid wax finish, some of the stretchers look very much like real Oak, there are no knots to give the game away easily. It's heavy enough and feels solid enough to be Oak!

Anyway, its time to clean up the workshop and hoover the entire house after I trod wood shavings into every room after smoothing the table top - I wasn't very popular.
No comments:
Post a Comment